Showing posts with label Food. Show all posts

06 May 2013

A New Habit Worthy of Celebration!


Smart School Cookies!
Go ahead, make a habit of’em!

1 ½ cups rolled oats (I use the 3-5 minute stove top kind)
½ tsp baking soda
¼ tsp salt
4 Tbsp brown sugar
3 Tbsp white sugar
1 fistful chocolate chips (or carob)
1 fistful raisins
1 Tbsp melted butter (or margarine)
1 Tbsp applesauce (I use the cinnamon kind because that’s what the kids like)
4 Tbsp Vanilla coconut milk (I use the organic sugar free kind)

Blend first 5 ingredients together in a food processor. Pour into a glass bowl and using a spatula, mix in the butter, applesauce, and milk, adding the chocolate chips and raisins last.  Spoon the cookie dough onto a greased cookie sheet. Bake for 6 minutes at 375° F.  Let cool five or so minutes before transferring to a serving plate or trying to bite into one. ;-P

Makes about 16 cookies (depending on how much the raw dough tempts you, of course)! 

Note: cookies will look rather “raw” in the middle when you first take them out of the oven.  That’s OK! They will cook a tad more while they sit, but they will still look rather light when compared to more traditional baked cookies ;-)


Background:
This post is dedicated to my Laurel’s Kitchen loving college roomie and is in honor of all our Saunders kitchen adventures together.

That being said, anyone who knows me well knows that Jazzy can NOT function without her chocolate! 

I discovered my taste for cookies at Hamilton College where there were always an abundance of yummy dining hall cookies.  Yes, you read that correctly, yummy!  Bagels, orange juice, and cookies- the nice “Bon Appetite” folks at Hamilton College always got those staples right!  It was also during my time at Hamilton, that I first began to brave the kitchen on my own ;-).  Laurel’s Kitchen was one of my first cookbooks, and the recipe for “Oatmeal School Cookies” became a fast favorite when we started adding chocolate chips (and often raisins to be healthier, naturally) to the mix!  These very cookies are still a favorite in my kitchen, however, in recent years; they have made seldom appearances since they are just so full of sugar.  And, butter…

So, it’s about time I discover a healthy alternative, right?  Happily, I think I have.  After a few weeks of research, recipe experimentation, and taste testing with my family, I’ve found a cookie that satisfies my chocolate cravings, desires to bite into something gooey, and my “healthy” conscience.  These cookies still have some sugar and butter in them, but Oh So much less- and BONUS- they are gluten and dairy free!  This is grand since we have friends and family members with differing levels of gluten intolerance and various other food allergies to things like nuts, eggs, dairy...  so, I’m glad I now have a healthful and yummy snack to offer to just about anyone! 

One more bonus- I get to indulge in worry-free raw cookie dough eating!

“When we make cookies, it is almost always these.  They are Cookies: utterly satisfying.  One would wish they could be maybe a little lower in fat and sugar, but there, that’s Cookies for you- don’t make a habit of’em.”

Robertson, Laurel, Carol Flinders, and Brian Ruppenthal. "Oatmeal School Cookies." The New Laurel's Kitchen. Berkeley: Ten Speed, 1976. 320. Print.

Well, Ms. Laurel and friends, your (our) wish has come true, and now we can make a habit of’em!

Allergy notes:  If you will be serving these cookies to those with gluten allergies, make sure the oats you use are clearly marked gluten free!  A Celiac friend recently taught me that most oats are milled in the same mills as wheat!  Many people with dairy sensitivities can get away with semi-sweet and dark chocolates.  If you will be serving to someone who can't, you can leave them out and double the raisins, or try substituting carob chips.  Carob chips can usually be found in the health or natural food sections of grocery stores.

14 November 2012

Cinderella Pumpkins: They can do more than decorate your front stoop!


Cinderella Stew
(recipe created with input from a few cookbooks including: “Pumpkin” by DeeDee Stovel, “Moroccan Modern” by Hassan M’Souli, “Mastering the Art of French Cooking” by Julia Child and friends, and a bit of my own brain juice)

1 cup of decent Bordeaux wine (quality does matter here)
2 Tablespoons of butter, divided
1 Tablespoon of olive oil for Dutch oven
Olive oil, enough to coat your hands and rub down a pumpkin
1.5 lb of Sirloin Tip Roast, cut into bite size pieces (pat dry with paper towel)
1 teaspoon salt (or so, I use about 2 pinches)
Freshly ground black pepper to taste
1 lb pearl onions, peeled (frozen works great, just thaw first)
8 oz (or so) baby Portobello mushrooms, cleaned, dried, and stems trimmed
½ cup of tomato sauce (plain, no added seasonings or anything)
2 Tablespoons red wine vinegar
1 Tablespoon brown sugar
3 cloves garlic, minced
1 bay leaf
1 cinnamon stick
6 whole cloves
¼ cup currants
½ teaspoon ground cumin (feel free to use more if you love cumin like I do!)
2 cups (about 1lb) butternut squash, peeled and cubed into bite sized pieces
1 Cinderella pumpkin
Rice


Pour a glass of Bordeaux to sip on while you cook.  Heat 1 Tablespoon of butter in a large sauté pan.  Add pearl onions and cook on medium high heat until they just begin to soften.  Add mushrooms, raise heat and stir constantly while sautéing for just 3 minutes more.  Turn heat off and set aside.

Heat the remaining Tablespoon of butter and 1 Tablespoon of oil in a large Dutch oven (cast iron is best) over medium heat.  Add meat, salt, and pepper.  Stir to coat the meat, DO NOT BROWN the meat!  Spread pearl onions and mushrooms on top of the meat, reduce heat a tad to avoid burning and cover the Dutch oven.

In a glass bowl, whisk together: wine, tomato sauce, minced garlic, vinegar, and brown sugar.  When thoroughly mixed, pour over meat and onions.  Scatter bay leaf, cinnamon, cloves, currants, and cumin.  Mix it all up with a wooden spoon incorporating any scrapings there may be on the bottom of the pan.  Bring stew to a boil, mix once more, reduce heat, and simmer coverd for 2 hours.

After the stew has been simmering for about 1 ½ hours, heat the oven to 350°F and place the rack on lowest setting.  Cut off the top of the pumpkin and scrape out the seeds and goopy, stringy insides.  REALLY make sure you get all the goopy strings out, they don’t feel or taste good!  Rinse inside and out, and pat outside dry with a dish towel.  Place pumpkin open end down on a cookie sheet or low rimmed oven safe dish filled with a half inch or so of water.  Rub the outside of the pumpkin down with olive oil to coat evenly.

Check your stew for flavor by tasting a spoon with a bit of the broth.  Adjust seasonings as necessary (I often add a few more drizzles of wine at this point and refill my glass).  Add butternut squash and mix well.

When the oven reaches temperature and you’ve added the butternut squash to the stew, place the Cinderella pumpkin on its cookie sheet with water in the oven and bake for 45 minutes, or longer if needed- until inside of pumpkin flesh pierces easily with a fork, but outside shell does not collapse.

Turn pumpkin shell open side up on cookie sheet (water should have evaporated, if not, get rid of it) and set aside.

Check your stew’s broth for flavor and pierce a piece of butternut squash.  Adjust seasonings as necessary.  If squash pierces easily with a fork, you are ready to transfer the stew to the inside of your pumpkin!  Cover your pumpkin with the lid from your Dutch oven or the uncooked "lid" you cut off the pumpkin, and place inside the oven again at the lowest setting possible or “warm” setting.

Cook 1-2 cups of rice (the kind that takes at least 20 minutes to cook) the way you normally would, except use beef broth for water or add beef bouillon to your water when it boils.

When your rice is ready, your stew should be as well!

To serve:  Spoon some rice on a dish. Spoon a scraping of pumpkin on top of your rice.  Spoon some hot stew on top of the rice and pumpkin.  Enjoy with a glass of left over Bordeaux or pumpkin beer!


Background:
Pumpkins are healthy!  Pumpkins adorn my front stoop every Fall, and I hate to let them sit there so long that they waste away- and we never carve every pumpkin I have on the front steps for Halloween…

So, I have really enjoyed finding ways to incorporate my pumpkin fall décor into our diets.  I find, the larger the pumpkin, the more watery the flavor and more coarse the texture- meaning, that the oven seems to be the best way to cook them!  What I don’t peel and dice for roasting in the oven, I tend to use as a serving dish for the stew in this recipe, or my pumpkin chili!


Additional Notes:

The Meat:  You can certainly use any old stewing beef for this dish.  HOWEVER, I have found that the Sirloin Tip Roast makes for a leaner and more tender stew!  For me, lean and tender is KEY and since red meat makes it to our dinner plates so infrequently, I might as well get it right and tasty.

Mushrooms:  If you think they are missing from the photos, you are right!  Turns out the baby bellas I thought were in my fridge- weren't.  No worries, Vidal probably liked the dish better as he isn't a big mushroom fan.

TIME:  I know this dish is time consuming.  I love my kitchen, and therefore enjoy spending the time in it that it takes to make this dish (admittedly tinkering on the computer and reading during the down times).  However, I know not everyone loves their kitchen-  SO, to cut some kitchen time out of this recipe, consider using your crock-pot!  You can sauté the onions and mushrooms, then put everything into your crock-pot, and go about your day returning to your kitchen in time to prepare the pumpkin in the oven and cook the rice!  You can even prep a day or more before by peeling and choping your butternut squash as well as cutting and cleaning out your pumpkin ahead of time and storing in your fridge (if you have room).

Personally, after finally getting my Julia Child Boeuf Bourguignon to taste right, and being enlightened by its AMAZING flavors, I have found it difficult to go back to using a crock-pot as it simply cannot compare to a cast iron Dutch oven!  So, I encourage you to make this dish on a day that you find yourself at home.  For me, that was yesterday as it was rainy, cold, and my errands could wait!


19 October 2012

When the Hubby is Away...


Portobello Mushroom Pasta

6ish oz Portobello caps, sliced and diced (bite size)
One medium onion, sliced and diced
3-4 cloves garlic, minced
Salt
Pepper
Olive oil
Parmesan and Asiago cheeses
Pasta of choice

Boil pasta of choice to al dente, drain, and set aside.

Heat olive oil in a sauté pan or cast iron fry pan (I used a cast iron fry pan).  Add a few drizzles of olive oil.  After oil has heated a bit, add onion and garlic.  Sprinkle salt and pepper to taste, and stir about.  When onion is just beginning to turn translucent, add the Portobello mushrooms.  Mix in the pan, and cook on medium flame/heat for 10 or so minutes stirring occasionally.  Taste, and adjust seasonings as necessary.

To serve: serve pasta on a dish.  Sprinkle with grated/shaved parmesan cheese then scoop mushroom mixture on top.  Lastly, sprinkle top of plate with grated/shaved asiago cheese.  Enjoy!


Background:
I love eating vegetarian and NOT having to worry about “where the meat is!”  So, when I know that the main meat eater (husband) in the family will not be home for dinner, I take advantage.  This particular dinner was “invented” on the fly because I had some leftover brown rice penne pasta and random Portobello mushrooms in the fridge…  I knew I needed to use the mushrooms up soon and I couldn't remember why I had originally bought them, so, I “invented!”

The two big veggie lovers in my family (Joaquin and I) just gobbled this dinner up.  It was just so simple, and tasty in a comfort-food kind of way!  My daughter ate a bit of it and then asked for a slice of ham, ha ha!  We will keep working on developing her love for veggies…


Additional Notes:

I know that eating less/no meat can be challenging.  Portobello mushrooms make an excellent substitute for meats in many recipes because their texture is “meaty” and their flavor is hearty.  Also, they do a great job of absorbing the flavors you add to a dish, making them extra versatile.  Let us not forget that they do have protein, are low in calories, and low in fat!

Fall is a great time of year to get mushrooms such as Portobello mushrooms at a good price.  I am just learning this!  Mushrooms like cooler weather such as we enjoy in spring and throughout the fall.  I guess that is why they are abundant at our local farmer’s market these days, and super cheap at the grocery store.  The organic mushrooms used in this meal cost $1.29 (for 6 oz), no joke!  Maybe that’s why they were in my fridge, for “no apparent reason…”

Portobello Mushrooms are GOOD FOR YOU!  Check out the links below to learn more.


02 October 2012

Fall is for APPLES!


Apple Crumb Pie

9-inch pastry shell, unbaked, chilled
1 cup sifted flour
½ cup brown sugar, firmly packed
1/8 teaspoon of salt
½ cup soft butter
6 cups peeled, sliced and diced apples (I like Jonagold)
1 cup granulated sugar
1 teaspoon ground cinnamon
Juice of a small lemon

Preheat oven to 375 degrees.

In a large glass bowl, mix sliced and diced apples, sugar, juice of a lemon, and cinnamon gently so that apple pieces are fully coated. Pile the apple mixture into your chilled pie crust.

To your food processor: add flour, brown sugar, salt, and butter.  Blend until crumbly and well mixed.  Sprinkle crumb topping over your apples being sure to cover them all with an even layer.

Place pie dish on a cookie sheet and bake in oven for 50 minutes.

ENJOY!


Background:
Did you know that Fall is my FAVORITE season of the year?  Hee hee!

So, Joaquin was off school the other day and I decided to take the kids (just me with the kids) to a mountain about an hour away to go apple picking!  I was a tad nervous at the thought of A: going as the only adult, and B: Driving so far, up a STEEP mountain, spending the day traipsing about carrying heavy bags of apples, and then… returning home safely!  

We made it  and actually had a lot of fun, hitching on to another group’s field trip to attend “apple school” and then picking apples and enjoying a picnic together.  We also made a few friends along the way, so that worked out!

Since our muscle power was limited this year, we stuck to just picking enough Jonagold apples to fill about a bag and a half- about all I could carry on my own.  Our haul was plenty to feed us one yummy dinner in a skillet with apples, cabbage, and sausages as well as two apple pies and plenty of snacking on slices.  

The highlight of our trip, for me at least, is that I finally made an apple pie that was not only edible, but yummy!  In fact, Vidal told me that it was “very good actually” and the best he has tasted (out of my oven) yet.  Success, I'd say!  You see, desserts aren't exactly my strong suit.  I love to eat them, I'm just not so great at making them.  So, if baking and desserts intimidate you too, have no fear!  If I can make it successfully, so can you!


Additional Notes:

The first time I made this pie, I used a store bought crust for the bottom.  The second time, I used a “pat-in-the pan” recipe from my trusty Joy of Cooking cookbook. 

I also forgot the fresh squeezed lemon juice the second time round…  Both pies ended up being tasty, although I did miss the lemon juice finding the second pie to be sweeter.


20 September 2012

Use up Every Bit of that Roasted Chicken!


Sweet Potato Dumpling and Chicken Casserole
(Adapted from a Whole Foods turkey recipe)

1 small yellow onion, chopped
8 oz frozen mixed veggies (I use ½ a bag of an organic carrot, corn, pea, and green bean mix)
2 cups of chicken broth
2-3 cups shredded leftover roasted chicken
1 sweet potato (about ¾ lb), cooked and mashed
1½ cups buttermilk
1½ cups of flour (divided into 1¼ c & ¼ c)
2 tsp baking soda
Olive oil, about 1 Tablespoon
Salt and pepper to taste


 Preheat oven to 400°F.  While oven is preheating, heat about 1 Tablespoon of olive oil in a large skillet.  Add onions, salt, and pepper.  Cook on medium-high heat stirring occasionally until onions are soft (about 6-7 minutes).  Add half a bag of frozen mixed veggies and cook until soft and hot throughout.  Lower heat and sprinkle ¼ cup flour over your veggies stirring to coat them all well.  Pour in chicken broth, raise heat and whisk.  Once the mixture begins to boil, reduce heat and simmer, whisking continuously until thickened (about 3 more minutes).

Turn heat off.  Add shredded roasted chicken and mix well.  Transfer to a 8x11 (or so) baking dish and set aside.

In a large mixing bowl, combine 1 ¼ cups flour, baking soda, ½ teaspoon salt, and ¼ teaspoon pepper with a fork.  Add mashed sweet potato and buttermilk and gently combine to make a thick batter.  Pour batter over chicken and veggie mixture in baking dish and spread about evenly.  Bake until top is golden brown and cooked through (test with a toothpick), about 30 minutes.

Serves 4-6.


Background:
Roasted chicken is a frequent weeknight meal at our house.  Buying a locally pastured chicken whole, is just so much more affordable than buying it already cut up!  When I buy a bird from a local farmer, it is always frozen solid.  So, I defrost it in the sink all day, and by 4pm it is usually ready to dress.  Roasted chicken with whatever roast-worthy veggies I have about makes a great one dish meal- but, even when guests come to share this meal, I always find plenty of meat left on the carcass.  The frugal homemaker in me hates to see that meat go to waste, even if it is mostly the more unpopular meats like back and wing…  So, I get my fingers dirty and pick the carcass clean!  I can usually fill at least most of one quart sized zip-lock baggie with leftover chicken meat (not skin).  I find that this is plenty for the above recipe, and I love that I can get two hearty dinners out of just one average sized roaster!

Sweet Potatoes are dominating my local farmers’ market these days, making the above dish especially seasonal and tasty this week!


Additional Notes:


Buttermilk purchased at the store usually comes in a quart.  Wondering what to do with the rest?  Buttermilk based muffins of course!  My children eat muffins for breakfast on most school mornings because of the ease and speed of them.  I use a buttermilk base and change up the mixings.  More on that another day…

Don’t waste any leftover roasted veggies!  I usually have a few spoonfuls of roasted veggies left over from my chicken roast dinners.  I save those for weekend omelets- or egg scrambles, as more often the case. J

10 September 2012

Use your Leftover Bruchetta!


Bruchetta Turkey Burgers

About 1 cup of leftover bruchetta
1lb or so of ground turkey
1 egg, beaten
Grated parmesan cheese to taste

Beat an egg in a glass bowl.  Add leftover bruchetta, juice and all.  Mix well and then add ground meat and a healthy dose of parmesan.  Using your hands and fingers, mix thoroughly and make your patties.  Grill or broil.  Serve as you would serve any other burger.  Enjoy!


Background:
Tomato season takes center stage in our home each summer- we love ourselves some bruchetta!  My bruchetta recipe is simple: diced roma tomatoes, well snipped up fresh basil leaves, diced onions, good quality balsamic vinegar, extra virgin olive oil, and salt and pepper to taste.  Joaquin and I especially enjoy our bruchetta when we start by going out to our back yard to pick the tomatoes and basil- nothing like truly fresh bruchetta! 

Anyways, we often “eat with our eyes” and end up with leftover bruchetta.  Like I said, there is nothing quite like FRESH bruchetta, and day (or longer) old just doesn’t cut it for us.  It is a shame to let it go to waste though, so one day I thought to make hamburgers out of the leftovers.  Boy I am glad I did!  These burgers are super tasty and moist.  Even the most anti-turkey burger people admit these burgers are yummy J


Additional Notes:

Any ground meat is good to use in this recipe.  I use chicken and turkey most often because I try to really limit our red meat intake…


Did you notice the “fries” in the picture?  They are oven fries made from batatas!  Maybe that can be a blog post for another day…

04 August 2012

Summer's Truly Heavenly Sip!

Jazzy’s Summer Sangria
(the red one)

2 bottles of CHEAP red wine (Merlot or Zinfandel are best)
4 small oranges (juice of two, slice the other two)
2 small lemons, sliced thinly
1 small lime, sliced thinly
1 medium red apple (I like Gala), chopped
Triple Sec (or Grand Marnier)
Brandy
Powdered sugar

Pour one bottle of wine into a large pitcher. Add juice of 2 oranges, and rest of the fruit. Add 2-4 shots of brandy, 3-6 shots of triple sec, and ½ cup of powdered sugar. Add second bottle of red wine. Stir and taste. Remembering that after the Sangria has sat for a few hours it’s flavors will intensify, think about how strong an alcohol flavor you like, and how sweet you want it. Add more triple sec, brandy, and powdered sugar accordingly. It should taste yummy for immediate enjoyment, but not so strong or sweet, that enjoyment later is made impossible by too much liquor or sugar…

No worries, practice makes perfect!


Background:
I have enjoyed Sangria in one form or another since I was a little girl. I seriously can’t remember my first glass, I was that young! I’ve been making my own sangria since I was in my early teens. Family members always liked it sweeter that I did, so I usually used a pink wine such as white zinfandel or blush. I NEVER used a soda of ANY kind. That would just be unthinkable to this Italian/Latina mutt! Now that I’m a “grown up” I am even more snooty about my sangria, ha ha! In fact, if I make it for company, I always make two. My red wine sangria and a white wine version. My white wine sangria is quite popular, I’ll share it with you some day… but the red is what I enjoy most- and I find that those who love red wine as much as I do (or more), prefer my red sangria to any other that has any kind of carbonated anything in it.
I am not sure what is truly Spanish or not, as lots of research has been totally inconclusive, but for me- I just can’t ruin my wine with orange soda, club soda, ginger ale, etc…


Additional Notes:
I use cheap red wines for my sangria.  The thought of marring yummy more expensive ones with other ingredients hurts me!  My current favorite cheap reds to use are "Three Wishes" Merlot that I buy at Whole Foods for less than $4, or a certified Organic cheap red called "Green Fin" from Trader Joe's that is also less than $4 a bottle.

Did you know that MOST wines are organic?  YES!  they trully are!  Growing grapes for wine is an art form as well as a science.  Wineries, viticulturists, and winemakers know that the best wines come from the best grapes.  Turns out, the best grapes are grown using the most ancient of methods: "organic" ones!  Surprise, that shouldn’t be!

26 July 2012

¡FELIZ CUMPLEAÑOS JOAQUÍN!


Chocolate Chip Zucchini Cake
(adapted from my Mom Sherwood's bread recipe)

3 cups flour
3 teaspoons salt
1 teaspoon baking soda
2 cups sugar
¼ teaspoon baking powder
1 tablespoon cinnamon
3 eggs
1 teaspoon vanilla
1 cup oil
2 cups grated zucchini
I 10oz bag of chocolate chips
butter to grease the cake pan(s)

Preheat oven to 325º.

Whisk dry ingredients in a large glass bowl using a wire whisk. Add wet ingredients to a mixing bowl and mix/blend on medium-high until a smooth creamy consistency is reached. Add grated zucchini and mix on medium until well incorporated. Add half of the dry mixture and mix on medium until well incorporated and then do the same with the rest of the dry ingredients. Turn mixer off after mixture has mixed for 3-5 minutes and looks creamy and thick. Remove mixing bowl and, using a spatula, add the chocolate chips and mix them into the cake batter.

Pour batter into greased cake pan(s) (I use 2 spring-form pans) and bake at 325º for 1 hour.


Orange Zest Frosting
(adapted from a book my sister-in-law gave me)

¼ cup (2 oz.) neufchatel cheese
2 ¼ cups powdered sugar
finely grated rind of one orange juice
1 Tablespoon or more of freshly squeezed orange juice

Using your mixer or hand beater, beat neufchatel cheese and orange zest until smooth and airy. Juice zested orange into a small bowl and set aside. Add ¼ cup powdered sugar and 1 tablespoon of your freshly made orange juice. Mix slowly until well incorporated and slowly add the rest of the powdered sugar, adding more juice as needed.


Background:
My son turned six this week! Growing up, we all had signature birthday cakes.  Grandma Sherwood's is Wart Cake (yep the "t" is intentional), Uncle Dan's is Date Nut Chocolate Chip, I always wanted Banana Bread Cake with sliced bananas in between the layers and penutbutter frosting...  you get the idea!  Naturally, now that I have my own little family, I've decided we all need signature birthday cakes too!  My husband's is Ice Cream Cake, Bella's is Carrot Cake, you now know mine, and you can guess Joaquin's! Since his birthday falls right as zucchinis are usually dominating our veggie garden, a birthday cake that features zucchini just seemed right! Happily, we all seem to love this cake, and it was a few years before we even told Joaquin there was zucchini in his birthday cake.

This year, I had to buy zucchini since our new house has yet to sprout a veggie garden (Hint to the husband!). Baking this cake has really made me crave zucchinis and now I totally miss getting my and my childrens' hands dirty in the veggie patch...


Additional Notes:

To make cupcakes, halve the baking time.

The frosting is so yummy, that I often find myself doubling or tippling the recipe justifying it with the “need” to use up the freshly squeezed juice!

This is also the frosting I use for my daughter's birthday cake, it is just THAT good.

29 June 2012

HAPPY BIRTHDAY VIDAL!


Malibu Rum Shrimp with curried peanut and rum sauce!

 Marinade:

1 lb. medium shrimp, raw, peeled, and devined
1/3 cup Malibu Rum (coconut flavor)
2 generous Tablespoons light brown sugar
2 Tablespoons lime juice
2 Tablespoons soy sauce
3 large cloves of garlic, minced
2 generous inches ginger root, peeled and grated with the juice

In a non-reactive shallow dish, grate the ginger and add the minced garlic, brown sugar, soy sauce and lime juice.  Using a fork, mix the ingredients until brown sugar is pretty well incorporated.  Add rum and mix about again.  Add raw shrimp to the dish and mix about covering all the shrimp with newly created marinade.  Let sit on counter for about 20 minutes, stir the shrimp about again and let sit another ten or so minutes before covering and placing in the fridge overnight.  In the morning, mix shrimp about one more time before recovering and letting it sit in the fridge until it’s time to grill them!

To grill: skewer the shrimp and grill over medium-high heat basting often with leftover marinade.  If grilling is not an option, place shrimp in a single layer on a cookie sheet and broil on high in the oven flipping and basting once.

Sauce:

1 cup of smooth peanut butter
1 can of coconut cream
4 Serrano chilies, stemmed and chopped (less for lower heat)
4 Tablespoons of soy sauce
Juice of 1 lime
4-6 Tablespoons Malibu Rum (coconut flavor)
2 garlic cloves, chopped
2 teaspoons medium-hot curry powder

In a blender or food processor, combine all the ingredients and process until smooth.  Let stand at room temperature for 1 hour to develop flavors.  Turn processor or blender on to mix and taste.  Add rum and or soy sauce to adjust flavor, mix and then serve as a dipping sauce or drizzle over skewered shrimp on a bed of rice.


Background:

HAPPY BIRTHDAY TO MY LOVE!  So, yesterday (28 June) was Vidal’s birthday.  I like to cook a special meal just for him on his birthday.  This year, I chose to make one of his favorite meals that I usually reserve for a Lenten Friday.

Earlier this week, Joaquin and I made friends with the local ABC store clerk while there gathering Malibu Rum (and other fun liquids, why not?).  Turns out, he is a recent culinary school graduate, and his enthusiasm for food was contagious.  He wanted to know what I would do with the assortment of liquor in our shopping basket, which led us to talk about this recipe.  Since he asked me to share it with him, I thought it would serve well as my next blog post too!

I really hope you try and enjoy this meal, as its sweet/spicy summery flavors are just so festive, they are bound to start a party in your mouth and then home no matter the day or occasion!


Additional Notes:

I serve Malibu Rum and diet Cokes in an old fashioned glass over ice before, during and after this meal.

Leftover dipping sauce is super another day with chicken tenders, veggies, etc.

In my enthusiasm over the meal, I forgot to photograph it-  guess that means that I will need to make it again sooner rather than later!


18 May 2012

Taco Night!

Fresh and Easy Tacos

½ lb – ¾ lb. Ground Turkey
1 Yellow Onion, diced
1 Yellow Onion, thinly sliced
1-2 Green Peppers, ½ diced and ½ sliced
1 Summer or Zucchini Squash, sliced in strips
Frozen Sweet Corn, kernels
Oregano, chopped fresh or dried
4 (or more) Cloves Garlic, minced
Salt and pepper
Adobo, powdered (optional)
Yellow Corn Tortillas
Olive Oil
Taco Toppings (guacamole, salsa, shredded cheese, sour cream, etc.)

Chop your vegetables, keeping diced onion and diced green pepper together in one glass bowl, and the sliced veggies together in a separate bowl.  Season veggies in both bowls with a healthy sprinkling of oregano, salt, pepper, and a sash of powdered adobo (optional).

Heat a good drizzle of olive oil in a skillet over medium high heat.  Add diced onion and green peppers.  As the onion begins to soften, add 2-3 cloves minced garlic.  Lower heat to medium and stir about for a 2-3 minutes, then add ground turkey.  Season with another generous sprinkle of oregano, salt, pepper, and adobo (optional) and then stir to mix well.  Cook until meat is done.  Add frozen corn kernels to taste and mix in until corn is warm throughout.  Taste and add salt and pepper if needed.

In a separate shallow sauté pan with lid, heat a good drizzle of olive oil over medium heat and add 2-3 cloves minced garlic, and sliced veggies.  Stir veggies about a bit adding more seasonings as you see fit.  Lower heat to avoid burning and cover pan.  Visit your veggies every few minutes to stir around and check to see if done.  Veggies are done when squash and peppers begin to feel soft.

Soften and warm tortillas either on a griddle or using the same skillet you cooked your meat in.  Drizzle some olive oil and heat surface before placing your tortillas.  Flip your tortillas at least once, and place on a paper towel to drain excess oil when tortillas are soft and pliable.

Serve buffet style with toppings so that everyone can build their own personally perfect tacos!


Background:

Taco night is a favorite in our house.  It is one of the very few ways I can get Joaquin to eat meat, Vidal always seems more enthusiastic about the meal than most I serve (probably because he gets to eat meat and decide how much!), and MariaBella just LOVES the shredded rice “cheddar” cheese I serve as a topping!

I like the versatility of the meal.  It is a simple meal to make and I can usually get it on the table in less than an hour.  When I have the luxury of a more leisurely pace, Joaquin makes a great sous-chef!  As meat takes a back seat in our family diet, taco night is one time that each individual can decide for themselves how much meat to eat.  Ground turkey breast is my preferred meat to use in this dish because the meat is just so lean, tender, and takes so well to the seasonings.  Also, turkey is the most affordable organic free range meat I can usually get my hands on!  On occasion, however, I will use ground buffalo or chicken instead.  The veggie part of this dish is the part that changes the most due to what is in season.  In the fall and winter months, I often used mixed frozen veggies.  This week, green peppers were finally more affordable again, so they were a prominent part of the dish.  Vegetable growing season is really starting now, so we are beginning to have more vegetable choices which will only make our spring and then summer tacos that much yummier!


Additional Notes:
 
Guacamole:  It is Joaquin’s favorite topping, after cheese.  I just love getting those fatty nutrients into his little body via guacamole!  To make it “fresh” and fast, I just take the meat of a fresh avocado and mash it up with a fork.  I add a few drizzles of lime juice and some salt and pepper to taste, and keep mashing about until I have a creamy spread.

Leftovers: I use leftovers to build lunch salads. I save the leftover ground meat to make a Sheppard’s' pie the following week. I'll share that easy recipe soon!

14 April 2012

Grilling Season!


Portobello Burgers, Fast!

Portobello Mushrooms, just the caps washed
Balsamic vinegar
Olive Oil
Salt
Pepper
Basil

In a shallow non-reactive dish (like a glass casserole dish), place your cleaned Portobello caps in a single layer smooth side up trying not to let them over lap.  Drizzle olive oil and balsamic vinegar over the caps and then sprinkle the spices onto the caps with a light hand.  Gently rub each cap in a circular motion to mix the ingredients and better coat each cap.  Flip the caps over and drizzle olive oil and balsamic vinegar making sure some oil and vinegar gets into the folds and some just goes into the dish.  Sprinkle spices with a light hand all over and let sit for 10 or so minutes.  To broil in oven: place caps smooth side down in the broiler for 4 minutes.  Flip each cap, baste the smooth side using what is left over from your non-reactive dish, and broil another 4 minutes or until they look done and tender.  To grill: baste the grill with olive oil and place smooth side up.  Grill on medium heat for about five minutes each side, basting the smooth side often with what is left over in your non-reactive dish and checking for tenderness.


Background:

Spring straight through Fall is our grilling season!  When Vidal is able to “man the grill” I get an extra nice treat, if not, I take the meal I’ve planned for the grill and use my broiler instead.  The Grill is not my domain, and that is OK by me!  Anyways, for me grill season is yummy, somehow nostalgic, and filled with comfort food flavors.  It is also pretty heavy on the meats… 

My challenge this year is to find ways to enjoy grilling season while maintaining our efforts to reduce the amount of meat our family ingests.  I’ve found, that I feel better when I don’t eat meat, especially red meats, and since we’ve just about eliminated red meat from my family’s diet, I see a difference in how my husband acts too (it’s only when we eat out and he chooses a red meat or eats something greasy that he seems complain about his tummy hurting or seems to act sluggish or grumpy).  Also, truly sustainable meats are rather pricey!  In the past few years, I’ve replaced red meats with poultry or Bison in my recipes.  In my Indian inspired dishes, tofu has been pretty well received and accepted.

Mushrooms, however, I know will never be accepted by the husband who only tolerates ones big enough to pick out of his dish!  So, for now, these yummy Portobello mushrooms are for me to enjoy, but I hope that Joaquin and MariaBella will soon follow!

20 March 2012

HAPPY FIRST DAY OF SPRING!!!


Asparagus and Salmon Pasta Recipe

 ½ lb. cooked Salmon or Tuna (broiled, grilled, roasted, etc.)
About 2 Tablespoons olive oil
1 yellow onion, sliced (or diced)
1 bunch thin asparagus spears, cut into ¼ inch pieces
5 eggs beaten (can substitute as many as 3 of the eggs for a liquid egg substitute)
2 Tablespoons milk
¼ cup of parmesan/asiago grated cheese
Salt and pepper
1 lb small spiral type pasta

Flake the cooked fish with a fork and set aside.  Fill a pot with water and bring to a boil for cooking the pasta.  While the pasta cooks, heat olive oil in a sauté pan over medium heat.  Add the onions, and when they begin to soften, add the asparagus.  Salt and pepper the mixture and sauté for 5 or so minutes until the asparagus are just tender, and then set aside off the heat.

In a large mixing bowl, whisk eggs, milk and cheese together and set next to the sink.  When pasta is “al dente,” toss in a colander and shake to drain excess water.  NO COLD WATER NEEDED!  When you’ve drained the excess water, toss the pasta into the mixing bowl and stir constantly and softly for about a minute, coating all the pasta with the sauce.  You should notice the sauce thickening a bit. Add the asparagus and onions, and then gently fold in the fish flakes last.  Taste, and adjust seasonings with salt, pepper, and even more cheese as you see fit.


Background:

I mentioned in an earlier post that I’d be talking more about asparagus!  Asparagus is one of the first vegetables of spring.  To me, it is a VERY welcome sign of spring and with it, more diversity of ingredients to cook with.  To my husband and children, not so much…  Last year, I tried steaming asparagus, broiling them with their favorite flavors, even smothering them in hollandaise sauce; all to no avail.  I just couldn’t get Vidal to eat them, I don’t think MariaBella even tried them, and Joaquin dutifully swallowed just as many pieces as we made him swallow before having mercy on him.  Such a sad foodie Mamá!  Here I was hoping to start my own asparagus patch in my back yard vegetable garden, moving one step closer to a more sustainable and seasonable kitchen and I couldn’t get my family to enjoy one of the first tender and delicious heralds of spring!

Well, throughout this past year, I’ve learned a few things as I’ve worked super hard at getting more vegetables and less meat into my husband’s body.  The most important thing that I learned, besides serving only the freshest possible ingredients, is to cut them up small!  I have yet to find a vegetable that goes straight from my back yard and onto the dinner plate, that Vidal won’t eat and dare I say it? Even enjoy!  Turns out, vegetables picked at their peak and served super fresh, are the tastiest, and the difference in flavor is so great, that those like my husband, find they may actually like veggies after all.

Anyways, getting back to asparagus…  It surprises me how many people I meet that say they don’t like them.  It also kind of bums me out… Asparagus is not only a sign of warmer weather and a fun new season; it is so good for our bodies boasting loads of vitamins and even folic acid!  So, when I saw the first bunches of asparagus offered at the market the other day, I just HAD to try them again with the family.  I’d learned about cutting things up small, after all, hadn’t I? 

My other challenge this time of year is Lenten Fridays.  In our house, it means we feature seafood or fish for dinner.  It’s amazing how hard it is for me to do something when I “have to do it” and how easy it seams the rest of the year!  We eat fish every week, at least once, but for some reason, Lent makes it hard on us… I feel my taste buds getting bored, and Vidal pouts every Friday when he asks what the dinner plan is.  So as I roamed about the market with my asparagus already in my basket, I also roamed the internet thanks to my handy phone.  I found a variation on this recipe, and thought it was a true sign from above!  I’d found a new way to serve fish, and a chance to overcome my family’s “dislike” of asparagus.  Happy Jazzy!

Vidal, Joaquin, and even MariaBella ate the salmon and asparagus pasta I made!  Vidal even commented that the meal was “pretty good!”  The best part for me was that when I told them what they were eating, Joaquin could have cared less as he kept chomping, and Vidal was only mildly surprised.  Sigh…


Additional Notes:

I broiled my salmon in the oven after rubbing it down with lemon zest, salt, and pepper.

Salmon can be a strong tasting fish, so for those who are unsure of fish, a lighter yet still firm (and easy to flake) fish to try is Tuna.  For me, Tuna is so different in flavor that it is an entirely different dinner, and that helps avoid taste bud boredom!

To read more about how great Asparagus is, visit:
http://asparagusnutrition.net/

15 March 2012

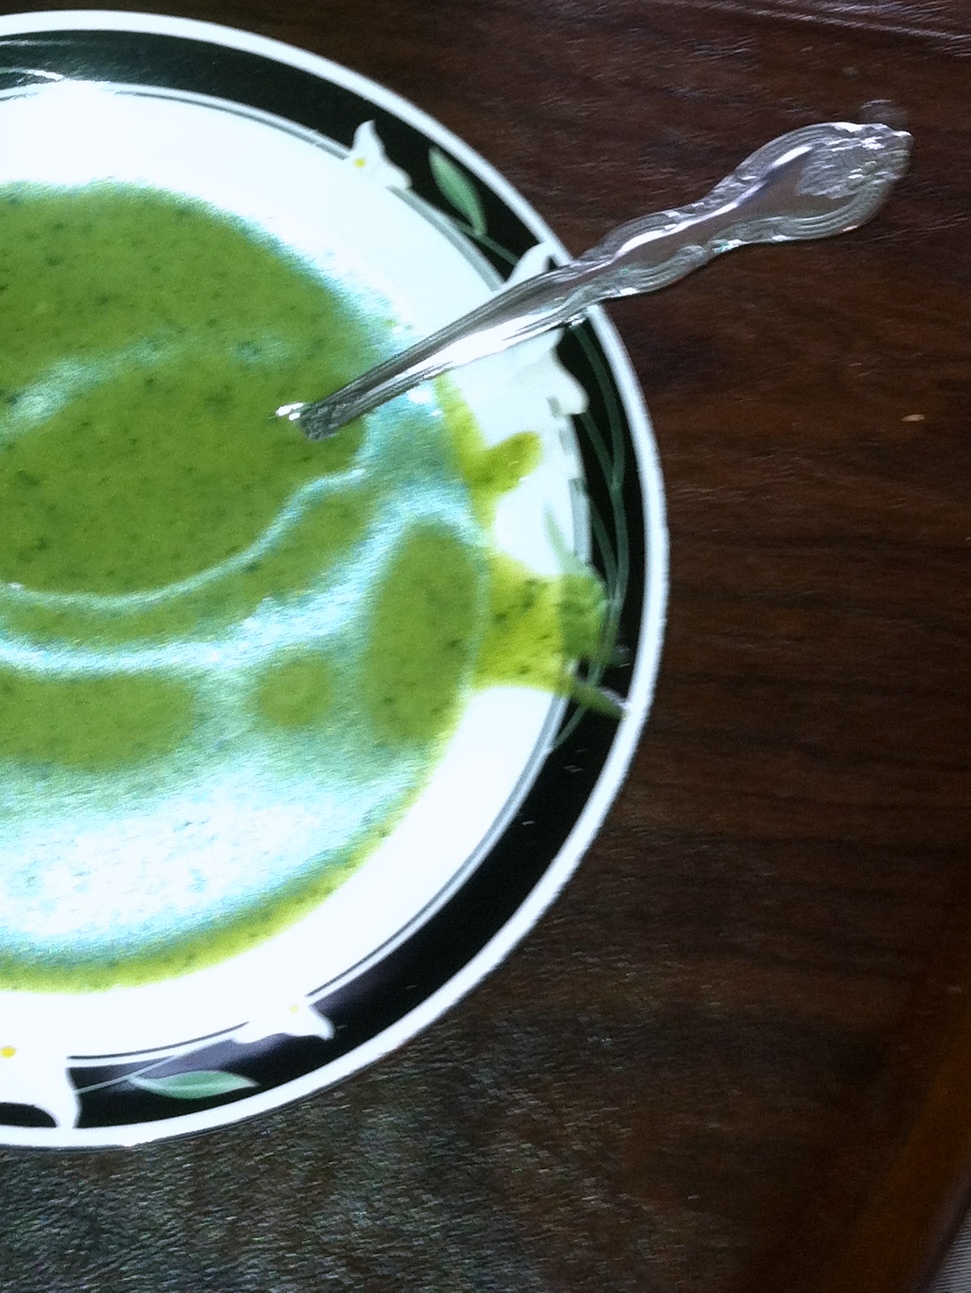
Sopa Verde!


Pumpkin and Kale Soup
“Sopa Verde” adapted from my Pumpkin cook book by DeeDee Stovel


2 slices of bacon (optional)
1 T. Olive Oil
1 Onion, chopped
3 Cloves of garlic minced
4 Cups of chicken or vegetable broth
4 medium-small potatoes, peeled and diced
½ lb. Kale, stems removed and chopped
Salt
1 ½ cups of cooked pumpkin, pureed
¼ t. ground nutmeg
White pepper
¾ c. half and half (optional)

Begin with the bacon if you choose to use it (it creates a totally different and totally yummy soup!). Place the strips of bacon into a heated Dutch oven (cast iron Le Cruset style if you have it) and brown it over medium heat until it gets crispy.  Remove the bacon, and set it aside to cool for later.  Keep the bacon fat in the Dutch oven and add olive oil until you get to about a total of 1.5 Tablespoons.  Use a wooden spoon to scrape the bacon-goodness off the bottom of the Dutch oven and to mix the 2 oils well.  Add onion and cook about 5 minutes until onion is soft and has begun to caramelize.  Add garlic and cook about a minute more.

Pour 2 cups of broth into the pan and stir everything about scraping the bottom with your wooden spoon to incorporate any brown bits.  Add potatoes, kale, and about a ½ teaspoon of salt.  Bring to a boil then reduce heat to a simmer and cover the Dutch oven.  Simmer for 20-25 minutes until potatoes are easily poked with a fork and kale is wilted.  About half way thru is a good time to check the potatoes and stir everything up a bit, especially the kale.

When potatoes are easily pierced with a fork, transfer it all to a blender and puree!  I puree about 1/3, add another 1/3 puree again, and then finish it all up.  Return the soup to the Dutch oven once it is all pureed and green looking.  Expect flecks of darker green as you can only get the kale but so small.

Stir in the remaining broth, pumpkin, and nutmeg.  Add salt and white pepper to taste and even add more nutmeg if you think it appropriate!  At this point, your soup is ready to serve.  You can either add half-and half to the whole mixture (take it off the heat first), a tad to each bowl, or none at all.  If you chose to use bacon, crumble some on the top of each serving.  We love to eat this soup with thick slices of crusty bread.


Background:

In a previous post, I mentioned this soup, and lo and behold, its recipe was requested!  I was thrilled to hear the request and have others join me on my journey.  So here, at the tail end of winter, it is!  This soup is super creamy and delish when the pumpkin is substituted for butternut squash; in fact, I don’t think I miss the bacon when I use butternut squash.  I find that when I don’t use the half and half, I taste the broth more…  Dairy and I aren’t the best of friends, so I tend to add half and half to individual servings, especially for the kids who could use the extra calories J.

MariaBella and Joaquin just love to dunk chunks of crusty Tuscan bread into this “sopa verde,” as they call it.  I love that my husband actually eats soup, let alone something green (I told them it had bacon the first time I served it to get him to eat it)!


Additional Notes:

Like most (if not all) my pumpkin recipes, this soup is super tasty when other hard winter squashes are substituted for the pumpkin.  I do, however find, that acorn squash lends a watery taste to the soup and bacon is a must to enhance the flavor; and buttercup squash makes for a sweeter soup…

To read more on how awesome squashes like pumpkin are for our bodies, visit:


05 March 2012

Truly Yummy Pumpkin Sauce

Pumpkin Sauce for Pasta

3 cloves garlic, peeled and crushed
1 onion, peeled and finely chopped
1 tbsp. olive oil
1 LB pumpkin flesh, peeled seeded and diced (use one pumpkin about 1 3/4 LB)
1 cup strong vegetable stock
2 tbsp. parsley, or 1 tsp. dried parsley
1/2 cup cream, half and half, or whole milk
1/4 tsp. ground nutmeg
pinch of salt
pinch of ground black pepper
pasta, freshly cooked, to serve

Gently fry the garlic and onion in oil for 3 or 4 minutes. Do not allow them to burn. Add the pumpkin and vegetable stock and bring to a boil. Cover and simmer over medium heat for about 15 minutes, stirring occasionally until the pumpkin is tender.

Blend pumpkin mixture in a food processor or blender and return to pan. Add and stir in the parsley, cream, nutmeg and seasoning.  Cook for a another minute and add a little of the pasta cooking water if the sauce is too thick. Pour over the pasta and serve immediately. Serves at least 4.

Add a bit of sausage, ground turkey, or crumbled meat substitute when you return to the pan after blending for more protein and flavor.  I personally love this sauce over soy ricotta cheese and spinach filled whole wheat ravioli.

Background:

Joaquin's first look outside today!

Joaquin’s first snow day of the year (March), reminds me that although the winter has been mild, it is still the winter food season.  This means that winter squashes are still in abundance in local gardens, markets, and my freezer.  I try my best to feed my family a seasonal diet because when foods are “in season” they are at their peak of everything: flavor, freshness, nutrients, affordability, etc.  I also try my best to preserve/lengthen the season for our favorite and most versitile foods by preserving and freezing what I can.  Around this time of year, frozen veggies and squashes dominate the freezer.

As my recent berry wash post hinted, I am about ready for a new food season, and this means I should probably make some room in our freezer. ;-)  So, time to use some of the cubed butternut squash I have in there!  I had been taking advantage of winter kale and made a few batches of pumpkin/kale soup, but I’m tired of it.  So, when my stepsister asked me to share some kid and husband-friendly recipes with her, I remembered this almost forgotten pumpkin gem!  The great thing about most of my pumpkin recipes is that I can substitute other squashes like butternut and even sweet potatoes for the pumpkin to yield a tasty variety that helps us to avoid winter taste bud boredom.

Monday’s are usually grocery shopping days for me, but since it was a “snow day” I decided to stay home and help get my freezer ready for spring berries.  After all, Vidal had to go out in the cold today for work and offered to bring home milk, and that was the only real immediate need…


Additional Notes:

To read more about seasonal eating, check out these fun links!


02 March 2012

Simple and Safe Berry Wash!


Simple Vinegar and Water Berry Wash


One part vinegar (I used Bragg's Apple Cider Vinegar)
Ten parts water

Fill your sink or a large bowl with the mixture.  Dump your berries in and swirl around!  Drain and rinse your berries.  Let your berries dry thouroughly before storing in the fridge.


Background
Guess what was recently on sale at my Whole Foods!?  Organic strawberries! Surprisingly (for February) sweet and tasty ones too! To me, this is a sign that spring is near, and that means Asparagus (more on that later) and BERRIES!

We love berries in our home!  Blueberry muffins and pancakes are so juicy and fullfiling during berry season.  MariaBella and I would eat an entire pint of strawberries each in one sitting if I let us.  Fresh berries are such a treat, but their season is short.  This means that it isn't always easy to take full advantage of the lower prices and robust flavor as I might like.  I found myself purchacing 3 lbs. of strawberries the day I saw them on sale at my Whole Foods (I wasn't kidding about MariaBella's strawberry eating capabilities) and wishing that I could get more.

Happily, my Grandma Denny shared with me an easy way to safely extend the shelf life of my fresh berries. Turns out, the reason they go bad so quickly when you get home, is that they are covered in mold spores. Don't ick out, these guys are good to have around!  They are beneficial to the berry plants and harmless to our tummies.  In fact, I recently learned that the mold and bacteria that occurs naturally on and around vineyards not only protect the fragile grape vines from diseases, but add to the flavor of the grapes, and the naturally occuring yeast bacteria are responsible for the ever cruicial fermentation of the grapes needed to make wine!  I digress... The happy berry news is that we can take better advantage of lower in-season prices and get our fill of fresh juicy berries without having to freeze or preserve them using a simple vinegar and water wash.  The vinegar kills any mold spores and bacteria that linger on the surface of your berries. The vinegar is diluted enough by the water so that the flavor of vinegar does not permeate the fruit, but not so much so that it looses any spore or bacteria killing power.  According to Grandma Denny, raspberries will last a week or more and strawberries will last almost 2 weeks in the fridge!  I washed my most recent stash of strawberries and they lasted 12 days before the first sign of spoilage.  I set 2 of them aside that were still OK as a science experiment, I'll keep you posted :-)

I am looking forward to my local berry season, when the berries will be even more fresh, tasty, and affordable.  Fresh berry salads for breakfast, lunch, and dessert are in my family's near future, YAY!

Additional Notes:

For my 3 lbs. of strawberries I used .5 cup of Bragg's Apple Cider Vinegar and 5 cups of water.

I lined cookie trays with dish towels and placed my rinsed berries on top to dry faster.

If you plan to store your berries in the same container you brought them home in, consider rinsing the container out in the vinegar wash too!

Vinegar and Water Washes are also great for washing other fruits and veggies!  For thicker skinned produce, use 1 part vinegar to 3 parts water.

Check out this link to see what the "experts" are saying about vinegar washes for fresh produce: http://www.npr.org/templates/story/story.php?storyId=14540742